お久しぶりです。高畑です。
前回にandroidのことをちょろっと書きましたが、今回もandroidネタを書きます。
今回はタイトルの通り、iphoneやandroidのFacebookアプリにある左側からにょいーんとなるメニューを実装してみたいと思います。
実装のイメージとしては、メニューとなるレイアウトと、メインとなるレイアウトを重ねあわせて。メインのレイアウトを右ににょいーんとスライドさせることで下に隠れていたメニューを表示するというものです。
実際にFacebookのアプリ側はどうやって実装しているのかはわかりませんが、ここでやる方法でかなり良い感じになります。
今回使用するレイアウトのxmlファイルです
|
1 2 3 4 5 6 7 8 9 10 11 12 13 14 15 16 17 18 19 20 21 22 23 24 25 26 27 28 29 30 31 32 33 34 35 36 37 38 39 40 41 42 43 44 45 46 47 48 49 50 51 52 53 54 55 56 57 58 59 60 61 62 63 64 65 66 67 68 69 70 71 72 73 74 75 76 77 78 79 80 81 82 83 |
<?xml version="1.0" encoding="utf-8"?> <LinearLayout xmlns:android="http://schemas.android.com/apk/res/android" android:layout_width="match_parent" android:layout_height="match_parent" android:orientation="vertical" > <FrameLayout android:layout_width="match_parent" android:layout_height="match_parent"> <LinearLayout android:layout_width="match_parent" android:layout_height="match_parent" android:orientation="vertical" android:id="@+id/menuLayout" android:background="#4969F1"> <LinearLayout android:layout_width="match_parent" android:layout_height="wrap_content" android:orientation="vertical" > <TextView android:id="@+id/TextView02" android:layout_width="wrap_content" android:layout_height="wrap_content" android:text="MENU1" android:textSize="20sp" /> </LinearLayout> <View android:id="@+id/View01" android:layout_width="match_parent" android:layout_height="1dp" android:background="#ffffff" /> <LinearLayout android:layout_width="match_parent" android:layout_height="wrap_content" android:orientation="vertical" > <TextView android:id="@+id/TextView01" android:layout_width="wrap_content" android:layout_height="wrap_content" android:text="MENU2" android:textSize="20sp" /> </LinearLayout> <View android:id="@+id/view1" android:layout_width="match_parent" android:layout_height="1dp" android:background="#ffffff" /> <LinearLayout android:layout_width="match_parent" android:layout_height="wrap_content" android:orientation="vertical" > <TextView android:id="@+id/textView1" android:layout_width="wrap_content" android:layout_height="wrap_content" android:text="MENU3" android:textSize="20sp"/> </LinearLayout> </LinearLayout> <LinearLayout android:layout_width="match_parent" android:layout_height="match_parent" android:orientation="vertical" android:id="@+id/mainLayout" android:background="#ffffff" android:gravity="center"> <TextView android:layout_width="wrap_content" android:layout_height="wrap_content" android:text="メインのレイアウト" android:textSize="30sp" android:textColor="#4f4f4f"/> </LinearLayout> </FrameLayout> </LinearLayout> |
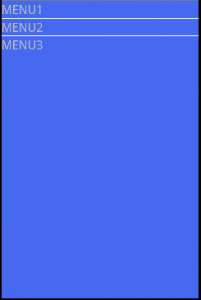
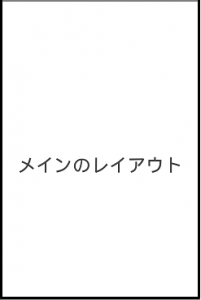
FrameLayoutでメインとメニューのレイアウトを重ねています。

このメニューのレイアウトの上に

メインのレイアウトが重なっています。
ここからActivityのソースです
|
1 2 3 4 5 6 7 8 9 10 11 12 13 14 15 16 17 18 19 20 21 22 23 24 25 26 27 28 29 30 31 32 33 34 35 36 37 38 39 40 41 42 43 44 45 46 47 48 49 50 51 52 53 54 55 56 57 58 59 |
public class FacebookMenuActivity extends Activity implements OnTouchListener { private int displayWidht = 0; private int displayHeight = 0; private int scrollX = 0; private boolean isOpenMenu = false; private DisplayMetrics metrics = null; LinearLayout mainLayout = null; @Override public void onCreate(Bundle savedInstanceState) { super.onCreate(savedInstanceState); setContentView(R.layout.main); mainLayout = (LinearLayout) findViewById(R.id.mainLayout); mainLayout.setOnTouchListener(this); // 画面を何dpX方向にスクロールするか、計算する metrics = new DisplayMetrics(); getWindowManager().getDefaultDisplay().getMetrics(metrics); displayWidht = getWindowManager().getDefaultDisplay().getWidth(); displayHeight = getWindowManager().getDefaultDisplay().getHeight(); scrollX = displayWidht - (int) (metrics.scaledDensity * 65); // X方向にスライドさせる値 } @Override public boolean onTouch(View v, MotionEvent event) { // メインのレイアウトが左端にある場合は右にスライドさせてメニューを開くアニメーション if ( !isOpenMenu ) { isOpenMenu = true; TranslateAnimation animation = new TranslateAnimation(0, scrollX, 0, 0); animation.setAnimationListener(new AnimationListener() { public void onAnimationStart(Animation animation) {} public void onAnimationRepeat(Animation animation) {} public void onAnimationEnd(Animation animation) { mainLayout.layout(scrollX, 0, displayWidht, displayHeight); mainLayout.setAnimation(null); } }); animation.setDuration(300); mainLayout.startAnimation(animation); } // メニューを閉じるアニメーション else { isOpenMenu = false; mainLayout.layout(0, 0, displayWidht, displayHeight); TranslateAnimation animation = new TranslateAnimation(scrollX, 0, 0, 0); animation.setAnimationListener(new AnimationListener() { public void onAnimationStart(Animation animation) {} public void onAnimationRepeat(Animation animation) {} public void onAnimationEnd(Animation animation) { mainLayout.setAnimation(null); } }); animation.setDuration(300); mainLayout.startAnimation(animation); } return false; } } |
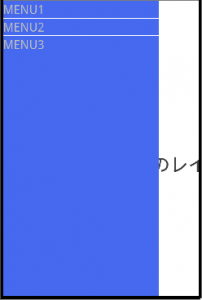
長くなってしまいましたがこれでメインレイアウトをタッチすると、右ににょいーんとずれて、下に隠れていたメニューのレイアウトが見えます。
もう一度メインレイアウトをタッチすると左ににょいーんして元の状態に戻ります。

アニメーション後、こんな感じの見た目になります。
今回のポイントはアニメーションの動作完了後に
|
1 |
mainLayout.layout(scrollX, 0, displayWidht, displayHeight); |
で物理的にレイアウトを移動させています
アニメーションは見た目だけ動いて、レイアウトのタッチ位置の座標までは移動していません。なので、物理的にレイアウトを移動させないと、画面のタッチイベントの取得位置が「アレ?なんでここで反応するの?」って感じになります。
アライドアーキテクツでは、一緒に働く仲間を随時募集しています。是非一度採用サイトをにょいーんと覗いてみてください。
iOSに浮気を始めたAndroidエンジニア? Androidはほとんど書いてない…


