この記事はNew Relic Advent Calendar 2021の20日目の記事です。
今回は↓の記事で紹介している「EC2 + nginx + fluentd + S3」にNew Relicを追加して
New Relic Oneでアクセスログを見れるようにしていこう!という記事です。
nginxのアクセスログをfluentdを使ってS3にファイルとして保存する(EC2 + nginx + fluentd + S3)
↑の記事ではハンズオンのような感じでnginxのアクセスログをfluentdを介してS3にファイルとして保存する方法を紹介しているので、
1から「EC2 + nginx + fluentd + S3」の環境を作ってからNew Relicの設定を行なっていきたいと思います。
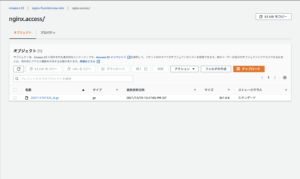
↑の記事に従って色々やってパブリック IPv4 アドレスにアクセスしたらS3にファイルができるという状態まで来ました。
ではこれからEC2にNew Relicのプラグインをインストールして色々設定していこうと思います。
fluentdのconfigをいじっていく前に現在のconfigを貼っておこうと思います。
|
1 2 3 4 5 6 7 8 9 10 11 12 13 14 15 16 17 18 19 20 21 22 23 24 25 26 27 28 29 30 31 32 33 34 35 36 37 38 39 40 41 42 43 44 45 46 47 48 49 50 51 52 53 54 55 56 57 58 59 60 61 62 63 64 65 66 67 68 69 70 71 72 73 74 75 76 77 78 79 80 81 82 83 84 85 86 87 88 89 90 91 92 93 94 95 96 97 98 99 100 101 102 103 104 105 106 107 108 109 110 111 112 113 114 115 116 117 118 119 120 121 122 123 124 125 126 127 128 129 130 131 132 133 134 135 136 137 138 139 140 141 142 143 144 145 146 147 148 149 150 151 152 153 154 155 156 |
#### ## Output descriptions: ## # Treasure Data (http://www.treasure-data.com/) provides cloud based data # analytics platform, which easily stores and processes data from td-agent. # FREE plan is also provided. # @see http://docs.fluentd.org/articles/http-to-td # # This section matches events whose tag is td.DATABASE.TABLE <match td.*.*> @type tdlog @id output_td apikey YOUR_API_KEY auto_create_table <buffer> @type file path /var/log/td-agent/buffer/td </buffer> <secondary> @type file path /var/log/td-agent/failed_records </secondary> </match> ## match tag=debug.** and dump to console <match debug.**> @type stdout @id output_stdout </match> #### ## Source descriptions: ## <source> @type tail path /var/log/nginx/access.log format nginx tag nginx.access pos_file /var/log/nginx/access.log.pos </source> <match nginx.**> @type s3 aws_key_id ################## aws_sec_key ############################### s3_bucket nginx-fluentd-new-relic s3_region ap-northeast-1 path ${tag}/ s3_object_key_format %{path}%{time_slice}_%{index}.%{file_extension} <buffer tag,time> @type file path /var/log/td-agent/s3 timekey 3600 timekey_wait 10m timekey 60 timekey_wait 60 chunk_limit_size 256m </buffer> </match> ## built-in TCP input ## @see http://docs.fluentd.org/articles/in_forward <source> @type forward @id input_forward </source> ## built-in UNIX socket input #<source> # type unix #</source> # HTTP input # POST http://localhost:8888/<tag>?json=<json> # POST http://localhost:8888/td.myapp.login?json={"user"%3A"me"} # @see http://docs.fluentd.org/articles/in_http <source> @type http @id input_http port 8888 </source> ## live debugging agent <source> @type debug_agent @id input_debug_agent bind 127.0.0.1 port 24230 </source> #### ## Examples: ## ## File input ## read apache logs continuously and tags td.apache.access #<source> # @type tail # @id input_tail # <parse> # @type apache2 # </parse> # path /var/log/httpd-access.log # tag td.apache.access #</source> ## File output ## match tag=local.** and write to file #<match local.**> # @type file # @id output_file # path /var/log/td-agent/access #</match> ## Forwarding ## match tag=system.** and forward to another td-agent server #<match system.**> # @type forward # @id output_system_forward # # <server> # host 192.168.0.11 # </server> # # secondary host is optional # <secondary> # <server> # host 192.168.0.12 # </server> # </secondary> #</match> ## Multiple output ## match tag=td.*.* and output to Treasure Data AND file #<match td.*.*> # @type copy # @id output_copy # <store> # @type tdlog # apikey API_KEY # auto_create_table # <buffer> # @type file # path /var/log/td-agent/buffer/td # </buffer> # </store> # <store> # @type file # path /var/log/td-agent/td-%Y-%m-%d/%H.log # </store> #</match> |
(これから何をするのかということですが、New Relic One に行けば教えてもらえる気がするので行ってみます。)
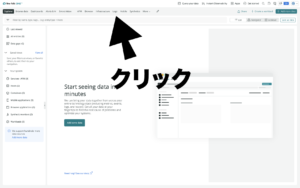
ログインしてすぐのこの画面に行ってLogsをクリックします。
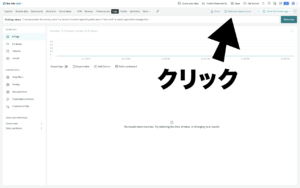
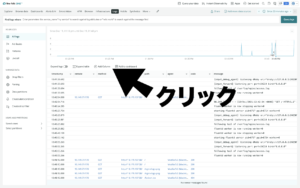
Logsの画面が表示されたら右上の「Add more data sources」をクリックします 。
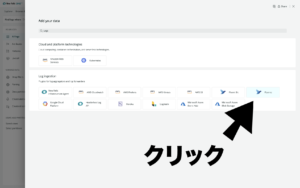
fluentdをクリックします 。
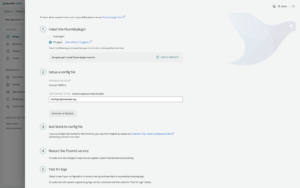
「Install the Fluentd plugin」 はTD agentでインストールしていくので下の方を選択します。
「Setup a config file」 には nginxのアクセスログのファイルパスを書きます 。
プラグインのインストールのためのコマンドが出てくるのでこれをEC2でsudoで叩きます。
|
1 2 3 4 5 6 7 8 |
[ec2-user@ip-172-31-37-145 ~]$ sudo td-agent-gem install fluent-plugin-newrelic Fetching fluent-plugin-newrelic-1.2.1.gem Successfully installed fluent-plugin-newrelic-1.2.1 Parsing documentation for fluent-plugin-newrelic-1.2.1 Installing ri documentation for fluent-plugin-newrelic-1.2.1 Done installing documentation for fluent-plugin-newrelic after 0 seconds 1 gem installed [ec2-user@ip-172-31-37-145 ~]$ |
New Relic One に戻り
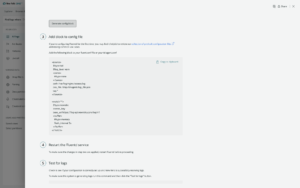
「Generate config block」をクリックすると以下のようなブロックが表示されるのでこれを
fluentdのconfigの
|
1 2 3 |
#### ## Source descriptions: ## |
の下に貼り付けます。
configファイルを編集します。
|
1 |
[ec2-user@ip-172-31-37-145 ~]$ sudo vim /etc/td-agent/td-agent.conf |
i を押して以下のブロックを貼り付けます。
|
1 2 3 4 5 6 7 8 9 10 11 12 13 14 15 16 17 18 19 20 |
<source> @type tail @log_level warn <parse> @type none </parse> path /var/log/nginx/access.log pos_file /tmp/td-agent/log_file.pos tag * </source> <match **> @type newrelic license_key ################################## base_uri https://log-api.newrelic.com/log/v1 <buffer> @type memory flush_interval 5s </buffer> </match> |
esc からの :wq で保存して抜けます。
fluentd を再起動します。
|
1 |
[ec2-user@ip-172-31-37-145 ~]$ sudo systemctl restart td-agent |
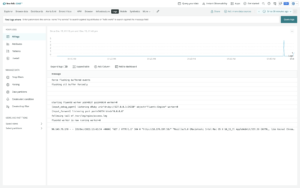
パブリック IPv4 アドレスにアクセスしてNew Relic Oneのログを見てみます
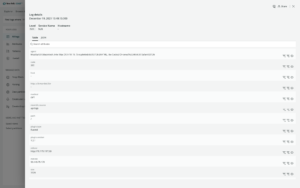
一番下にアクセスログがありました。クリックしてみます。
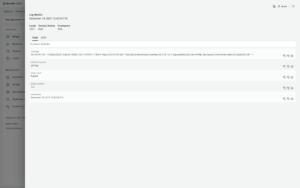
messageにギュッとなってますね。
少し見辛いのでfluentdのconfigを編集します。
|
1 |
[ec2-user@ip-172-31-37-145 ~]$ sudo vim /etc/td-agent/td-agent.conf |
i を押して編集していきます。
<parse> の @type のところを nginx に変更します。
|
1 2 3 4 5 6 7 8 9 10 11 |
<source> @type tail @log_level warn <parse> -- @type none ++ @type nginx </parse> path /var/log/nginx/access.log pos_file /tmp/td-agent/log_file.pos tag * </source> |
esc からの :wq で保存して抜けます。
fluentdを再起動します。
|
1 |
[ec2-user@ip-172-31-37-145 ~]$ sudo systemctl restart td-agent |
messageが空欄のログをクリックしてみるとこれが表示されました。
Add Columnをぽちぽちして色々追加していきます。
いい感じになりました。
今回はfluentdとNewRelicを繋げるという簡単な記事でしたが、
今後も勉強したことを自分で試してみて記事にしていこうと思います。
ありがとうございました。
2021年新卒入社。letroの開発・運用業務を担当しています。


