
React Nativeを触ってみる
はじめに
初めまして!プロダクト開発部のタンと申します。
最近、弊社の新サービスを開発するプロジェクトに携わってたことで、いろいろな新しい技術を学んだことができました。その中にReactというJavascriptライブラリーがありまして、javascriptも興味がありますので、それとReact Nativeというネイティブアプリを開発するためのライブラリーを調べて、触ってみました。React Nativeはとても素晴らしいライプラリーだと思いますので、今回ご紹介したいと思います!
React-Nativeとは
- ReactはFacebookが開発したUIのパーツを作るためのJavascriptライブラリです
- React NativeはReactベースでネイティブアプリを構築できるライブラリです
特徴
- Javascriptだけで両方IosとAndroidプラットフォームのアプリを構築できます
- WebのCSSの属性でUIを調整できます
- IosとAndroidの基本的なコンポーネントはサポートされいて、使うことができます
- 拡張性(例えば: React Nativeはまだサポートしてないコンポーネントを使いたい場合、自分で開発し、追加できます)
- chromeやSafariでデバッグすることができます
- オプンソースのライプラリなので、コミュニティが広い
デメリット
- いくつかのコンポーネントはまだサポートされていません。例えば: Map, AndroidのpushNotification
- WindowとLinuxでIosアプリをビルドできません
- 複雑なアプリを開発したい場合、React Nativeの以外にReduxやRelayなどを勉強するべきです
開発環境を設定する
Macで開発環境の設定する方法を紹介します。
MacでReact Nativeの開発環境を立ち上げるために、以下のツールをインストールする必要があります
- Xcode
- Nodejs
|
1 2 |
brew install node |
|
1 2 |
brew install watchman |
これはFacebookが作ったファイルの変更を監視するためのツールです。
- React Native CLI
|
1 2 |
npm install -g react-native-cli |
サンプルアプリを作ってみよう
簡単な画像スライドショーアプリを作ってみましょう!
新規プロジェクトを作る
まず、React Native CLIで簡単に新規のプロジェクトを作ってください
|
1 2 |
react-native init simpleSlide |
アプリを走ってみる
以下のコマンドを実行したら、iOS Simulatorにアプリがインストールされて、表示されます
|
1 2 3 4 |
cd firstProject react-native run-ios |

ソースコードを変更する
React NativeはJavascriptのES2015を使いますので、ES2015が知らない方は事前に調べてください。
プロジェクトの構造は以下の通りです。
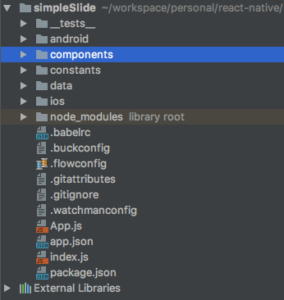
- index.js: Reactアプリ(App.js)を登録して、初期化するところです。
|
1 2 3 4 |
import { AppRegistry } from 'react-native'; import App from './App'; AppRegistry.registerComponent('simpleSlide', () => App); |
- App.js: アプリのメインクラスです。
|
1 2 3 4 5 6 7 8 9 10 11 12 13 14 15 16 17 18 19 20 21 22 23 24 25 26 27 28 29 30 31 32 33 34 35 36 37 38 39 40 41 42 43 44 45 46 47 48 49 50 51 52 53 54 55 56 57 58 59 60 61 62 63 64 65 66 67 68 69 70 71 72 73 74 75 76 77 78 79 80 81 82 83 84 85 |
import React, {Component} from 'react'; import { Animated, StyleSheet, View } from 'react-native'; import Header from "./components/Header"; import Item from "./components/Item"; import {listImages} from "./data/images"; import {APP_WIDTH, APP_HEIGHT, APP_PADDING_TOP, ITEM_SIZE} from "./constants/app"; /** * アプリのメインクラフ */ export default class App extends Component { constructor(props) { super(props); this.state = { scrollX: new Animated.Value(0), listImages: null } } // データから画像リストを取得して、アプリのstateに格納する loadImages() { let currState = this.state; currState.listImages = listImages; this.setState(currState); } componentWillMount() { this.loadImages(); } render() { // スライド画像リストを作成する let listItems = Object.keys(this.state.listImages).map((key) => { let imageUrl = this.state.listImages[key].url; let description = this.state.listImages[key].description; return <Item key={key} id={key} imageUrl={imageUrl} description={description} scrollX={this.state.scrollX}/> }); return ( <View style={styles.container}> <Header/> <Animated.ScrollView style={styles.slide} contentContainerStyle={{ alignItems: 'flex-start', justifyContent: 'center', flexGrow: 1 }} horizontal={true} decelerationRate={0} snapToInterval={ITEM_SIZE} scrollEventThrottle={16} snapToAlignment="start" showsHorizontalScrollIndicator={false} onScroll={Animated.event( [{nativeEvent: {contentOffset: {x: this.state.scrollX}}}] )} > {listItems} </Animated.ScrollView> </View> ); } } const styles = StyleSheet.create({ container: { height: APP_HEIGHT, }, slide: { flex: 0.65, width: APP_WIDTH, marginTop: APP_PADDING_TOP }, }); |
- components: アプリで使うコンポーネント
- Header.js: アプリのヘッダー
|
1 2 3 4 5 6 7 8 9 10 11 12 13 14 15 16 17 18 19 20 21 22 23 24 25 26 27 28 29 30 31 32 33 34 35 36 37 38 39 40 41 42 43 44 45 46 47 48 |
import React, {Component} from 'react'; import { Text, Animated, View, StyleSheet, } from 'react-native'; import {BAR_HEIGHT} from '../constants/app' /** * アプリのヘッダ */ export default class Header extends Component { constructor(props) { super(props); } render() { return ( <Animated.View style={styles.header}> <View style={styles.bar}> <Text> Simple Photo Slide </Text> </View> </Animated.View> ); } } const styles = StyleSheet.create({ header: { position: 'absolute', top: 0, left: 0, right: 0, backgroundColor: '#03A9F4', overflow: 'hidden', }, bar: { marginTop: 25, height: BAR_HEIGHT, alignItems: 'center', justifyContent: 'center', } }); |
- Item.js: スライドショーのアイテム
|
1 2 3 4 5 6 7 8 9 10 11 12 13 14 15 16 17 18 19 20 21 22 23 24 25 26 27 28 29 30 31 32 33 34 35 36 37 38 39 40 41 42 43 44 45 46 47 48 49 50 51 52 53 54 55 56 57 58 59 60 61 62 63 64 65 66 67 68 69 70 71 72 |
import React, {Component} from 'react'; import { Image, Text, Animated, StyleSheet } from 'react-native'; import {ITEM_FONT, ITEM_PADDING, ITEM_SIZE} from "../constants/app"; /** * スライド画像アイテム */ export default class Item extends Component { constructor(props) { super(props) } render() { let imgSource = {uri: this.props.imageUrl}; let inputRange = [ (this.props.id - 2) * ITEM_SIZE, (this.props.id - 1) * ITEM_SIZE, this.props.id * ITEM_SIZE, (this.props.id + 1) * ITEM_SIZE ]; let scale = this.props.scrollX.interpolate({ inputRange: inputRange, outputRange: [0.7, 1, 0.7, 1], extrapolate: 'clamp' }); return ( <Animated.View style={[ { paddingLeft: ITEM_PADDING, paddingRight: ITEM_PADDING, alignItems: "center", backgroundColor: 'transparent', marginVertical: 10, transform: [ { scale: scale } ] } ]}> <Image source={imgSource} style={styles.image}/> <Text style={styles.description}> {this.props.description} </Text> </Animated.View> ); } } const styles = StyleSheet.create({ image: { width: ITEM_SIZE, height: ITEM_SIZE, borderRadius: ITEM_SIZE / 2 }, description: { fontFamily: ITEM_FONT, fontSize: 20, color: '#FF0088' } }); |
- app.js: いくつか属性を定義するところ。例えば: アプリの長さ、高さやスライドショーのアイテムアイテムのサイズなど
|
1 2 3 4 5 6 7 8 9 10 11 12 |
import {Dimensions } from 'react-native'; let { height, width } = Dimensions.get('window'); export const APP_WIDTH = width; export const APP_HEIGHT = height; export const BAR_HEIGHT = 32; export const APP_PADDING_TOP = BAR_HEIGHT * 3; export const ITEM_SIZE = width * 0.68; export const ITEM_PADDING = width * 0.03; export const ITEM_FONT = "Apple SD Gothic Neo"; |
- data:
- images.js: スライドショーの画像データを定数で定義するためです
|
1 2 3 4 5 6 7 8 9 10 11 12 13 14 15 16 17 18 |
export const listImages = [ { url: 'https://c1.staticflickr.com/9/8325/28515392361_ac78d010eb_b.jpg', description: 'Gal Gadot' }, { url: 'https://c1.staticflickr.com/3/2701/4252994964_3c961d5d0d_b.jpg', description: 'Scarlett Johansson' }, { url: 'https://timedotcom.files.wordpress.com/2015/01/jennifer-lawrence.jpg', description: 'Jennifer Lawrence' }, { url: 'https://d.ibtimes.co.uk/en/full/1422570/dakota-johnson.jpg', description: 'Dakota Johnson' }, ]; |
処理について、簡単に説明したいと思います。
- アプリケーションのレイアウトは以下の二つのコンポーネントで分けて、App.jsにインポートすることで使えます
– Header.js: アプリのヘッダーのコンポーネント
– Item.js: スライドショーのアイテムのコンポーネント - UIを変更するため、各のクラスにstyles定数を定義し、CSSと同じ属性で変更します
- アニメーションの処理はReact NativeのAnimatedを使います

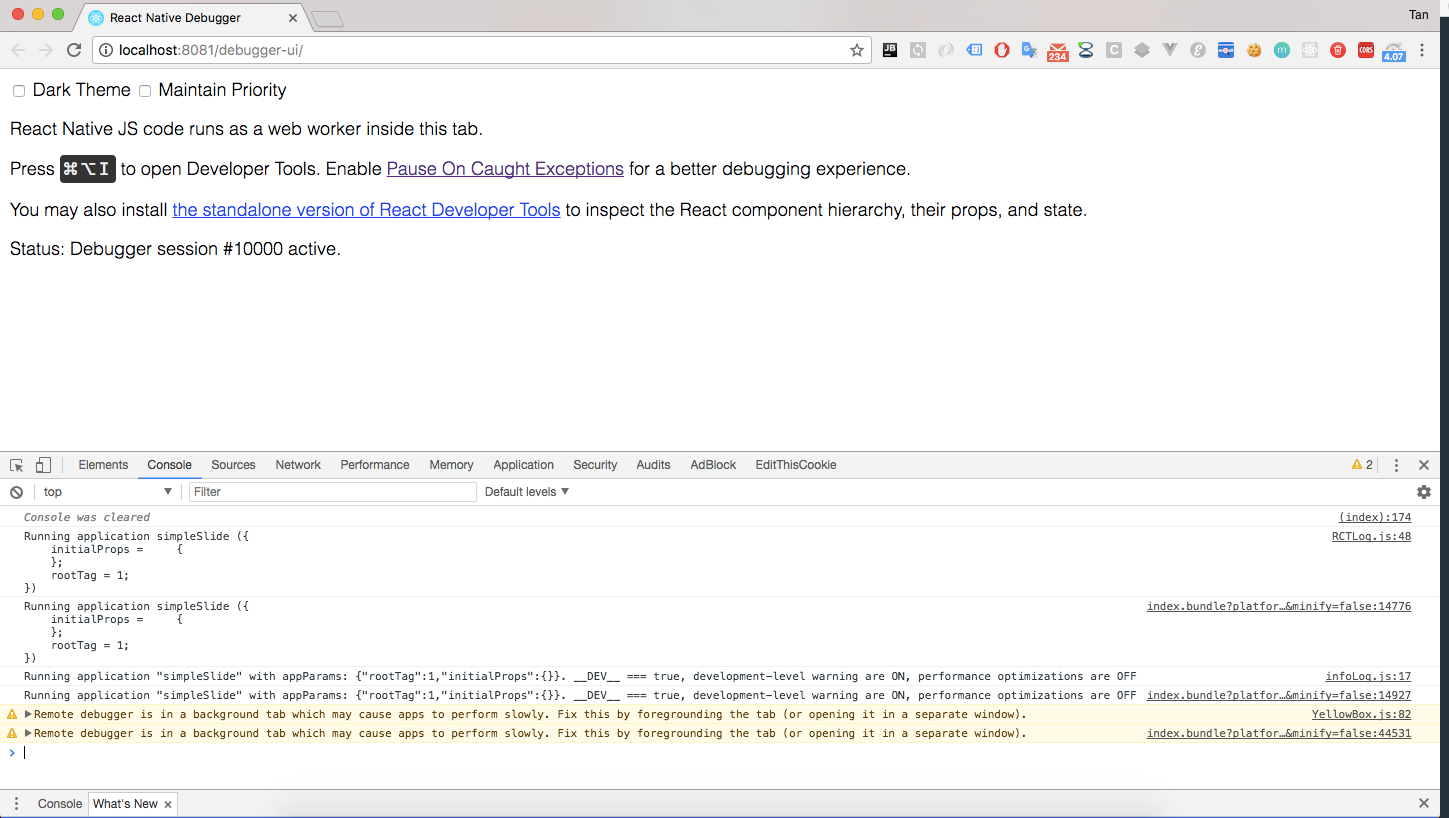
デバッグ方法について
上記に書いてある通り、React Nativeはjavascriptを使いますので、webアプリケーションと同じブラウザーでデバッグすることができます
- iOS Simulatorでアプリを走っている時に、「⌘D」ショートカットキーで開発メニューを開いて、「Debug JS Remotely」を選択すると、MACのブラウザーのコンソールでデバッグすることができます

最後に
今回はReact Nativeについて紹介しました。
React Nativeを使って、javascriptだけで両方 IOS、Androidとも動くことができるアプリケーションを構築できますので、Webエンジニアにとって、とてもいいライブラリだと思います。
Webエンジニアの方はネイティブアプリケーションを開発したい場合、React Nativeをオススメします。ぜひ試してください!!!